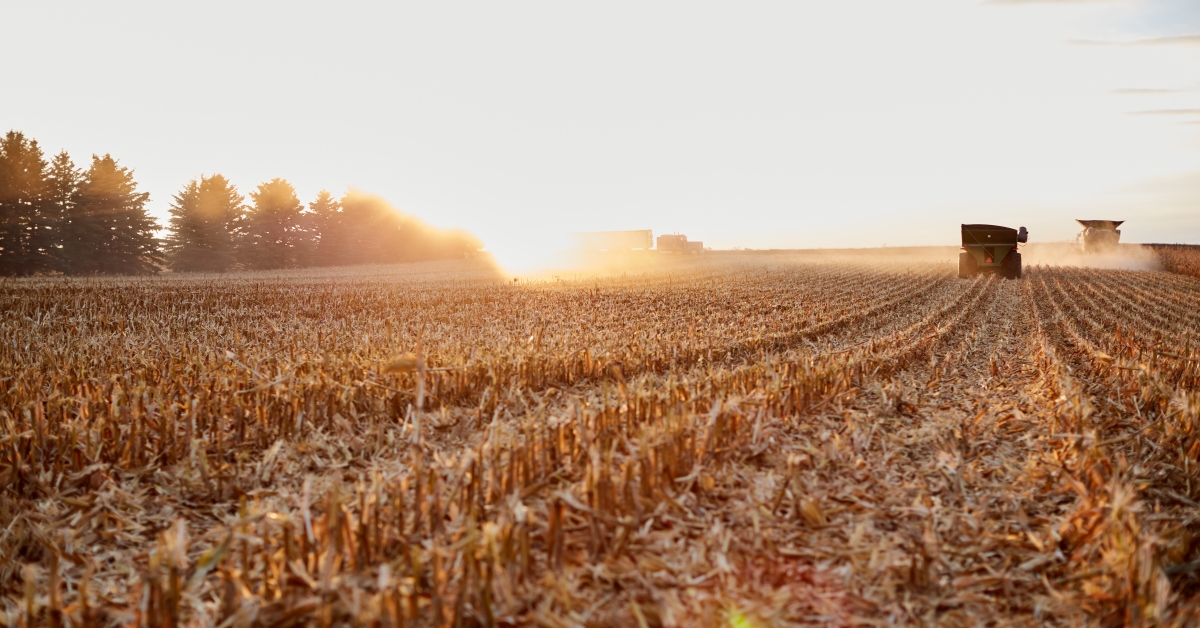
Farmers love what they do, and whether they realize it or not, each one lives for the harvest — not just crop farmers with grain harvests but livestock owners marketing animals, along with dairy farms and pounds of milk sent to the creamery. Nothing is more exciting than harvest time in the field, but by now, the excitement has worn off, fields are empty and we are beginning to reflect on the past year. Although it seems like harvest equipment was only just put away, silage has been in storage for several months, and early evaluations of how well feed was made for the upcoming year can begin.
Evaluating the farm’s available feed early on establishes a starting point for the upcoming year’s performance and feeding schedule. Typically, the first thing on anyone’s mind after opening a new feed is to sample it with the intentions of determining two things: First, is it good feed? And second, how much of it can we use? Although these are important questions, they are only a sampling of the many worth asking in order to truly understand the feed, which will have a significant impact on the next 12 months of the farm’s performance.
The first thing to consider doing at the time of opening a storage unit is an assessment of the container itself. There are many ways to store feed, and each have their advantages and disadvantages. Bunkers and piles rely heavily on proper plastic management to produce a good feed, so check the top to ensure that nothing was punctured during filling or covering, allowing oxygen to enter. Large piles and bunkers require multiple sheets of plastic, so inspect areas of overlap and side walls for gaps or improper coverage. The sides of piles and ends of bunkers should have been well-sealed to prevent water from getting in. Best practices for bunkers involve lining the side walls with plastic and folding it over the top to minimize spoilage. Low slopes of any storage should be sealed completely, typically with sand or lime. Ag bags should be checked for stretch marks in the plastic and holes, which indicate weak points or damage from filling. Discovering problem areas early could help prevent more spoilage. At opening, look for discolored or moldy feed that could have come from poor sealing or damage to plastic that was unnoticeable from the outside.
Once the plastic is pulled back and the fermented feed is exposed, continue the assessment. Dispose of moldy, discolored and rotten feed, which can be more prevalent near the edges of all storage types. Within a week of feed removal, a face starts to take shape, with silage becoming more uniform and consistent, and that is when the first sample can be taken to determine the silage’s nutrient values and quality. Consideration must be given to how long the forage has been stored so that the feed is not opened too early. An earlier blog, “Understanding the process of corn silage fermentation and starch availability,” explained that fermentation takes three to four weeks to complete, with improvements in feed quality occurring over time after a longer resting period. Taking a sample before fermentation is complete or from inconsistent silage will not provide accurate numbers. After establishing that a consistent product is being removed from storage, you can begin taking other measurements.
Density is a great tool and is well-documented as being a crucial factor in making high-quality forage. When forage or high-moisture corn is packed tighter with a higher density, it means that there was less oxygen trapped inside at the time of filling, allowing for a faster and more complete fermentation. Measuring this includes obtaining a sample by using a corer with known dimensions to use the depth of the core and the weight of the sample to calculate pounds per cubic foot. Recommended densities are shown in the table below. These benchmarks are applied to piles and bunkers, with more leniency given to bags, since they do not pack as well.
|
|
Density (lbs./ft³) |
|
|
|
Dry matter basis |
Wet basis |
|
Corn silage |
>16 |
>45 |
|
Haylage |
>16 |
>45 |
|
Earlage |
40–45 |
|
|
High-moisture corn |
>45 |
>65 |
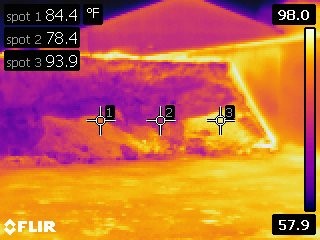
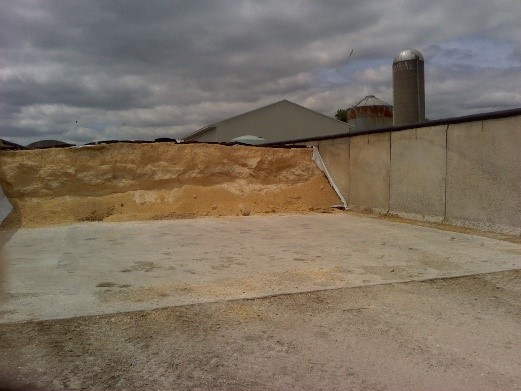
Temperature readings can be taken in multiple ways and are a great gauge for determining how stable the feed is after being reintroduced to oxygen. Two core temperatures taken three feet and six inches inside the storage unit will provide a comparison. Core temperatures are expected to fall within 10° of the ambient temperature at filling. Elevated temperatures within the first 12 inches of feed exposed to oxygen suggest that the feed is unstable, potentially due to mold and yeast growth that creates heat and diminishes the feed quality. Thermal imaging also allows us to record surface temperatures and provides a picture of the entire feed-out space. These images show different ranges of colors for different degrees present on the face, giving us clues about problem areas within the feed, as is illustrated in the pictures below. For example, in these pictures, everything looks normal in the picture on the right, but thermal imaging shows that the feed that is loose at the bottom of the bunker is starting to heat. Face management is crucial to controlling shrink during feed-out. There may only be small losses each day, but when combined for the year, these lost nutrients diminish feed quality and can lead to a significant amount that does not make it to the bunk.
Making forage inventory calculations after the harvest is also important. Too often, farms run short, and before getting to consider the quality of a processed new crop with good fermentation and storage, farmers panic when they realize that there isn’t enough feed. This expensive mistake and the unsettling worries that accompany it can be avoided by evaluating feeds and feed inventory throughout the year in a constant effort to ration what you have stored. Early estimates of the feed inventory and how they match up to daily feed deliveries can prevent forage shortages through planning, which could include feeding fewer pounds, including a supplement or animal sales. Inventories are calculated by using several hand measurements and density numbers in several equations to estimate of how full a box would be from an oddly shaped pile. Today, we can also use drones to more accurately measure inventory, as is described in Derek Wawack’s most recent article, “Silage inventory from the sky.”
Fall is a great time to begin on-farm feed assessments. Start taking notes in the fall about how the harvest went, making sure to label different storage areas with variety, crop or field labels. Take a notebook with you and make observations of newly opened feed, because at next year’s harvest, you will have forgotten the things you would have liked to do differently. For a more comprehensive forage audit, contact your nearest dairy team member. Doing a forage audit in the fall provides you with a scorecard from the finished harvesting season while providing valuable information for the months ahead. Continuous grading throughout the year is necessary, but in order to improve, you have to know where you started.
- Log in to post comments